The holidays are all about gathering with loved ones and celebrating traditions—and what better way to do that than by decorating holiday cookies? Whether you’re hosting a cookie swap, making homemade gifts, or enjoying a cozy afternoon in the kitchen, decorating cookies is a fun way to spread cheer.
From simple designs to intricate details, decorating cookies brings people together and adds a personal touch to your holiday treats. In this guide, we’ll cover everything from choosing the right cookie base to mastering decorating techniques, so you can create festive cookies everyone will love.
Start With The Perfect Cookie Base
Before you start decorating, you need a cookie base that not only tastes delicious but also holds up under layers of icing and decorations. A sturdy, flavorful cookie ensures your designs stay intact while still providing great taste. Whether you’re making buttery vanilla sugar cookies, spiced gingerbread, or cinnamon-kissed snickerdoodles, these classic cookie types allow you to focus on the creative part—decorating—without compromising on quality or texture.
- Sugar Cookies: With a rich, buttery flavor, these cookies bake into a smooth, even surface that’s perfect for icing. The sturdy texture makes it easy to cut into festive shapes without worrying about crumbling or breaking.
- Gingerbread Cookies: These spiced cookies have just the right balance of warmth and flavor, holding their shape while staying soft on the inside. Ideal for decorating gingerbread people or intricate holiday scenes, their durability makes them a perfect canvas for detailed designs.
- Snickerdoodle Cookies: Offering a delightful twist on the traditional holiday cookie, snickerdoodles bring a warm cinnamon-sugar flavor to your cookie platter. Their durable yet soft texture makes them an excellent base for creative decorating.
- Gluten Free Chocolate Chip Cookies: For those with dietary needs, gluten free chocolate chip cookies provide a delicious base that’s both sturdy and soft. Packed with rich chocolate chips, they offer the perfect foundation for all your decorating ideas, ensuring everyone can enjoy the fun.
Gather Your Cookie Decorating Tools And Toppings
Just like any creative project, the right tools can make all the difference when decorating holiday cookies. Whether you’re creating simple designs or intricate masterpieces, having the essentials on hand ensures a smooth and enjoyable process. Here’s a list of must-have items to get you started:
Tools:
- Cookie cutters: From classic shapes like stars and snowflakes to festive gingerbread men and Christmas trees, cookie cutters allow you to create uniform shapes that are easy to decorate and fun to eat.
- Piping bags (or resealable plastic bags): Essential for controlling your icing and creating clean, precise lines.
- Piping tips: A variety of tips will give you flexibility in your designs—think small round tips for details and writing, and star tips for creating textured decorations.
- Offset spatula or butter knife: Great for spreading icing smoothly across the surface of your cookies.
- Toothpicks or skewers: Handy for making tiny adjustments or creating marbled designs with your icing.
Toppings:
- Royal icing: This icing hardens to a smooth, glossy finish, making it ideal for creating clean lines, intricate designs, and detailed decorations. It’s perfect for cookies that need to be stacked, packaged, or even shipped, as it dries firm and holds up well.
- Buttercream icing: Softer and creamier than royal icing, buttercream is great for cookies that will be eaten quickly or for creating soft, textured designs. It adds a rich, buttery flavor to complement your cookies.
- Sprinkles and edible glitter: From classic red-and-green sprinkles to shimmering edible glitter, these toppings add a fun pop of color and texture.
- Food coloring: A few drops of gel food coloring can turn white icing into any festive hue you need. Use it to match your holiday theme or get creative with vibrant, eye-catching designs.
- Candy decorations: Mini candy canes, sugar pearls, chocolate chips, or even crushed peppermint pieces make great accents to bring extra flair and flavor to your cookies.
Decorating Techniques For Every Skill Level
With your cookies baked and your toppings ready, it’s time to get creative! Whether you’re a beginner looking for easy wins or ready to tackle advanced designs, there’s a decorating style for you.
Beginner: Easy Peasy, Cookie Squeezy
Decorating cookies doesn’t have to be complicated to be beautiful—or delicious! If you’re just getting started, rest assured that even simple techniques can yield delightful, festive results. The key is to embrace the joy of decorating without worrying too much about precision or perfection. Here are a few beginner-friendly techniques to get you started:
- Chocolate Dipped Cookies: One of the easiest ways to decorate holiday cookies is by dipping them in melted chocolate. Simply melt some chocolate (white, milk, or dark) in a microwave-safe bowl, then dip half of your cookie into the smooth, melted chocolate. Lay the cookies on parchment paper to set, and while the chocolate is still soft, sprinkle on some festive toppings like crushed peppermint, holiday sprinkles, or edible glitter. The result? A strikingly elegant cookie that’s almost too pretty to eat!
- Icing Pens: If piping bags and tips feel a little too advanced, icing pens are a fantastic alternative. These pens give you the control of writing or drawing directly onto your cookie, making it easy to add simple designs like dots, stripes, or even holiday messages. You can outline shapes, create patterns, or personalize cookies with names. Icing pens are especially great for little hands, so this technique is perfect for kids!
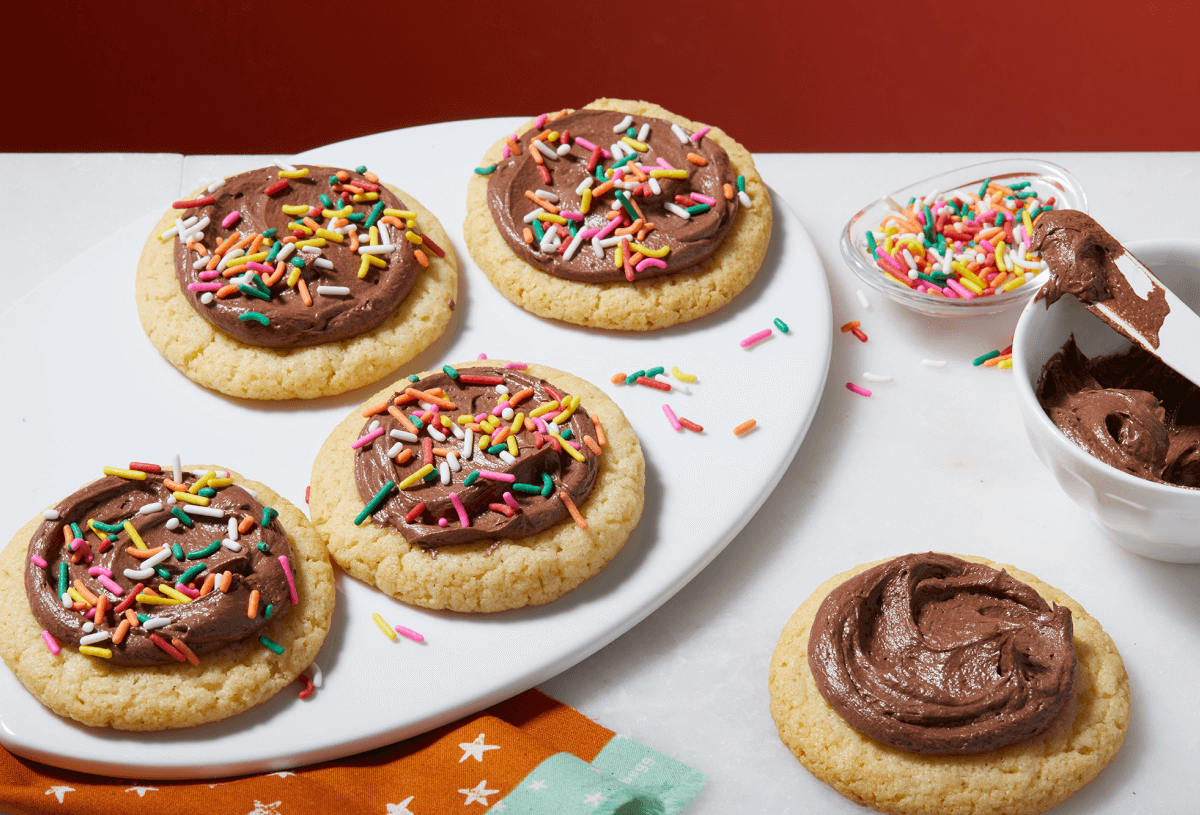
- Spoon-Icing Technique: No need for fancy tools—grab a spoon and get creative! Spoon-icing is as simple as it sounds. Drop a spoonful of icing onto the center of your cookie and use the back of the spoon to gently spread it toward the edges, creating a smooth layer of icing. You can stick with a single color for a classic look, or use multiple colors for a fun, marbled effect. Top it off with sprinkles or candy, and you’ve got a cookie that’s both easy to decorate and festive to look at.
Intermediate: Turning Up The Cookie Magic
Once you feel comfortable with the basics, it’s time to step up your cookie decorating game! Intermediate techniques can add more flair to your holiday cookies while still being accessible and fun. Here are a few techniques that will elevate your cookie decorating skills:
- Flooding with Royal Icing: Flooding is a popular technique that allows you to create a smooth, even layer of icing on your cookies. Start by outlining your cookie shape with a thicker consistency of royal icing using a piping bag. Once the outline is set, thin out your royal icing with a few drops of water until it reaches a pouring consistency. Carefully pour the thinned icing into the outlined area, using a toothpick to spread it evenly to the edges. This technique gives you a polished, professional look, perfect for creating solid colors or intricate designs on your cookies.
- Marbling Colors: Marbling is a stunning way to add visual interest to your cookies. After flooding your cookie with a base color of royal icing and allowing it to dry slightly, you can introduce a second color. Using a toothpick, gently swirl the two colors together to create a beautiful marbled effect. This technique can produce unique patterns on each cookie, ensuring that no two cookies look the same. Experiment with different color combinations to match your holiday theme!
- Glitter Accents: Take your cookie decorating to the next level by adding a touch of sparkle! Once your cookies are decorated with royal icing, sprinkle edible glitter or shimmering sugar over the wet icing before it sets. This adds a magical finish to your designs, catching the light and making your cookies stand out. For an added touch, you can use luster dust mixed with a little clear alcohol to paint shimmering designs directly onto your cookies, giving them an extra dimension of elegance.
Advanced: Masterpieces In The Making
For those ready to tackle a more sophisticated level of cookie decorating, advanced techniques allow you to create stunning edible art that will wow your family and friends. These methods may require a bit more skill and patience, but the results are worth the effort! Here are three advanced techniques that can elevate your holiday cookies to true masterpieces:
- Intricate Piping: If you’ve mastered the basics of piping, it’s time to get detailed! Intricate piping involves using different piping tips and consistencies of royal icing to create beautiful designs on your cookies. Think lace patterns, delicate flowers, or even intricate snowflakes. Start with a steady hand and a clear design in mind. You can use a small round tip for fine details and a star tip for textures. Practice on parchment paper before moving to your cookies, and don’t hesitate to layer designs to create depth. Intricate piping adds a sophisticated touch that transforms your cookies into stunning works of art.
- 3D Cookies: Take your cookie decorating to a whole new dimension with 3D cookie designs! This technique involves cutting and assembling cookie pieces to create shapes that stand upright, such as gingerbread houses or festive ornaments. Begin by baking cookie pieces using sturdy dough, then assemble them with royal icing as your glue. Once your structure is stable, you can pipe and decorate each section to bring your creation to life. Add candy accents, edible glitter, and painted details for a show-stopping centerpiece that will be the talk of your holiday gathering.
- Edible Paint: Unleash your creativity with edible paint! This technique allows you to add intricate details and vibrant colors to your cookies beyond traditional icing. You can create your own edible paint by mixing food-grade alcohol (like vodka) with gel food coloring or purchasing ready-made edible paints. Once your base layer of icing has dried, use fine brushes to paint designs directly onto your cookies. This technique is perfect for adding fine details, shading, or even watercolor effects. The possibilities are endless, and the final product will leave everyone in awe!
Cookie Love That Lasts: Storage And Gifting Ideas
Once you’ve decorated your cookies to perfection, it’s important to store them properly to keep them fresh and beautiful. If you’re planning to gift them, presentation counts too! Here are some ideas to make sure your cookie creations last and impress:
Storage Tips:
- Airtight containers: Store your decorated cookies in a single layer in an airtight container to keep them fresh and prevent smudging.
- Wax or parchment paper: If stacking your cookies, place a sheet of wax or parchment paper between each layer to protect the icing.
- Freezing cookies: Decorated cookies can be frozen for up to three months. Just make sure the icing is completely set before freezing, and thaw them at room temperature before gifting or serving.
Gifting Ideas:
- Cookie boxes: Pack your cookies in decorative cookie boxes lined with festive tissue paper for a polished presentation.
- Cookie tins: For a classic holiday look, metal tins are both practical and charming.
- Cellophane bags: Individually wrapping your cookies in cellophane bags tied with a festive ribbon makes for an easy and thoughtful gift.
For more details on how to prepare cookies and other baked goods for shipping, read How to Mail Muffins, Cookies, and Other Baked Goods.
Crafting Holiday Magic With Every Cookie
Decorating holiday cookies is more than just the final product—it’s about the joy and creativity of the process. Whether you’re dipping, piping, or painting, each step is a chance to express your style and share some holiday cheer. And the best part? You don’t need to be a pro—it’s all about having fun and embracing the little imperfections that make your cookies unique.
